
SmartReach Sysadmin users and Superusers can create other administrative users and assign them roles based on their required responsibilities.
Fall24
Creating a User
To create a user:
- Log in to the SmartReach Portal as a Sysadmin or Superuser.
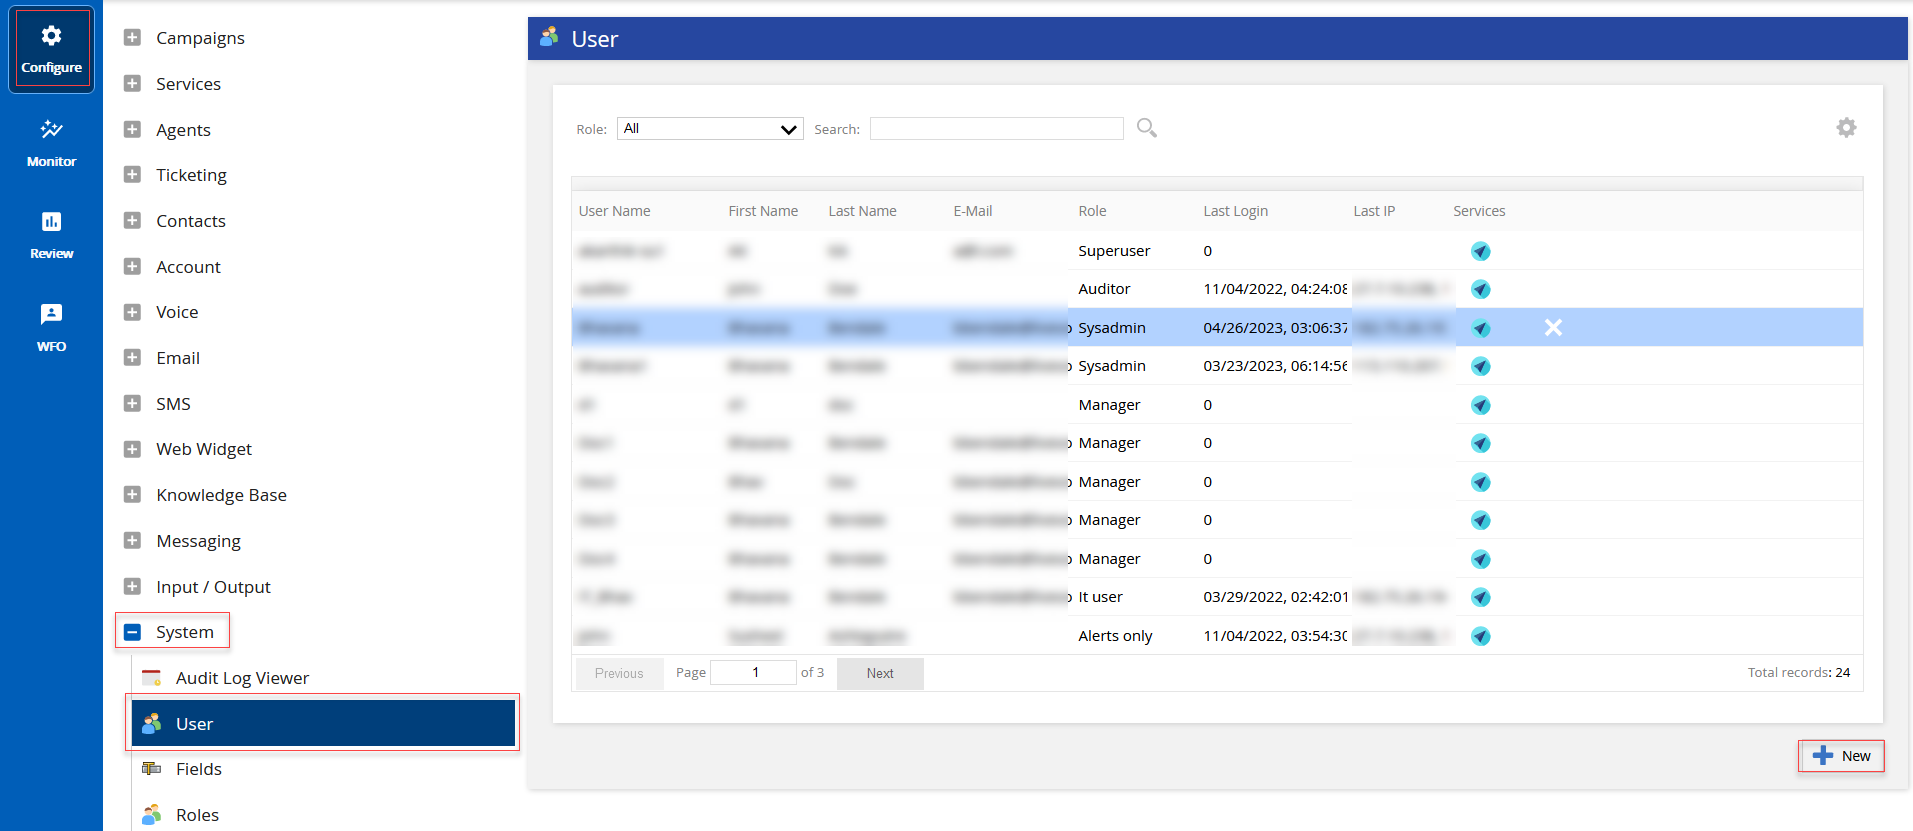
- Go to Config > System > User.

- In the User window, click the
 icon. The User pop-up window appears.

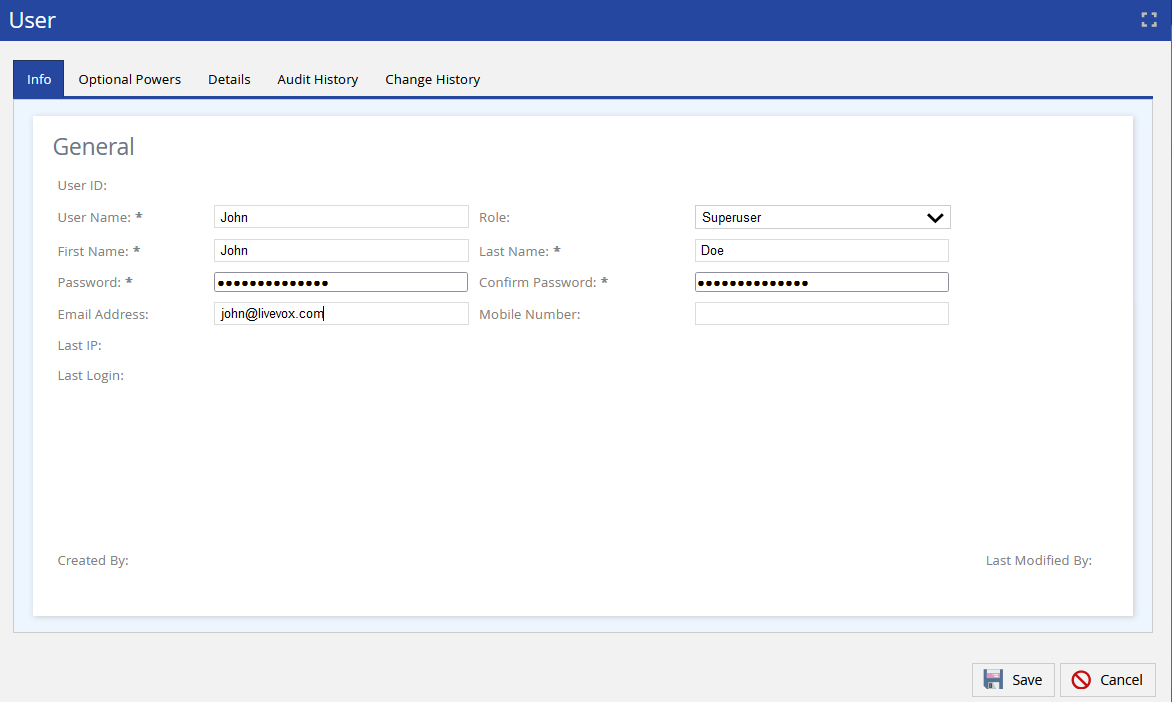
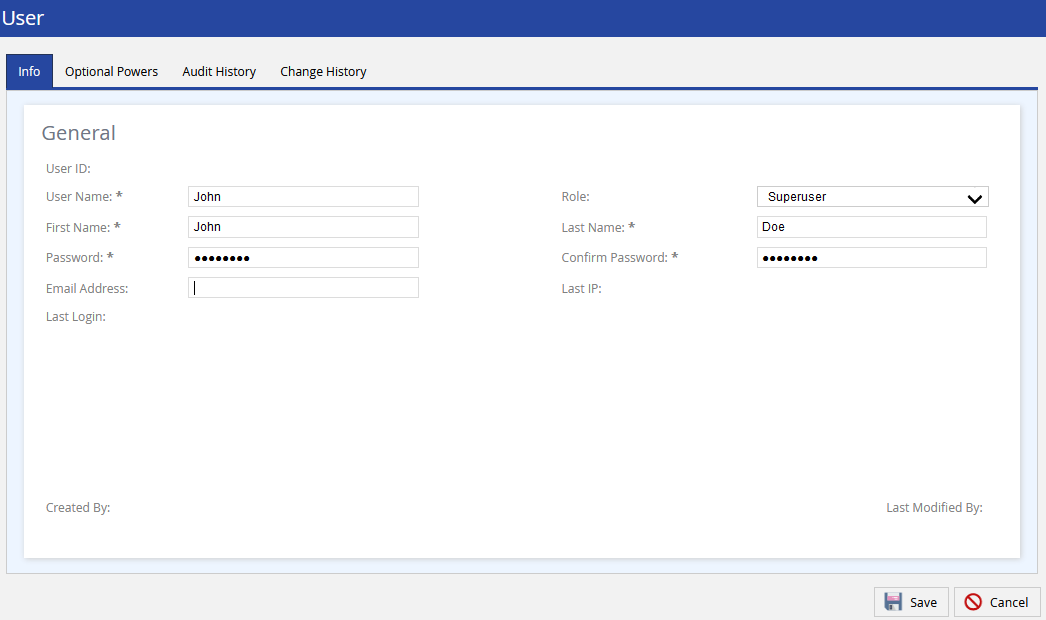
- In the Info tab, enter the user information in the following fields:
- User Name
- Role
- First Name
- Last Name
- Password
- Confirm Password
- Email Address
-
Mobile Number
Username and password are case-sensitive. If the password management functionality is enabled, the following restrictions also apply:- Passwords must contain a minimum of 8 characters and at least one digit.
- Passwords must not be the same as the last 4 passwords.
- Passwords must not exceed 40 characters.
- From the Role drop-down list, select an appropriate role for the user. For example, you can select Superuser or Manager.
Info
For more information about access permissions for each role type, see User Roles and Permissions.
- In the Optional Powers tab, enable the optional powers for users by selecting the required checkboxes:
For information about user roles, see User Roles and Permissions.
- In the Details tab, custom fields added for your users are displayed. You can update the values of the custom fields. You can create up to 20 custom fields from the Configure > System > Fields window.
- Click Save. The new user is added and the User editor window is displayed.
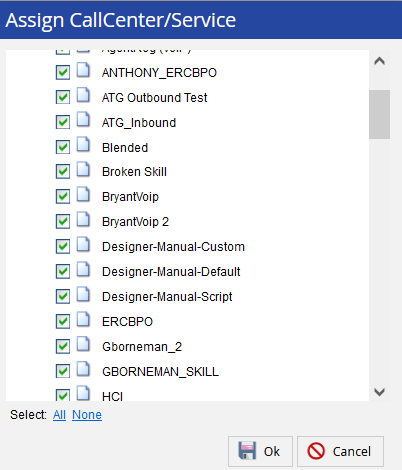
- Double-click the note
 icon to assign services to the new user. The Assign CallCenter/Service window is displayed.

- Select the services from the list and click Ok.
For more information about services, see Understanding Service Types.
The Audit History tab provides the logs that track changes made across LVP. Also, you can view the changes made to a user account on the Change History tab.
Demo
LV19/Fall23
Creating a User
To create a user:
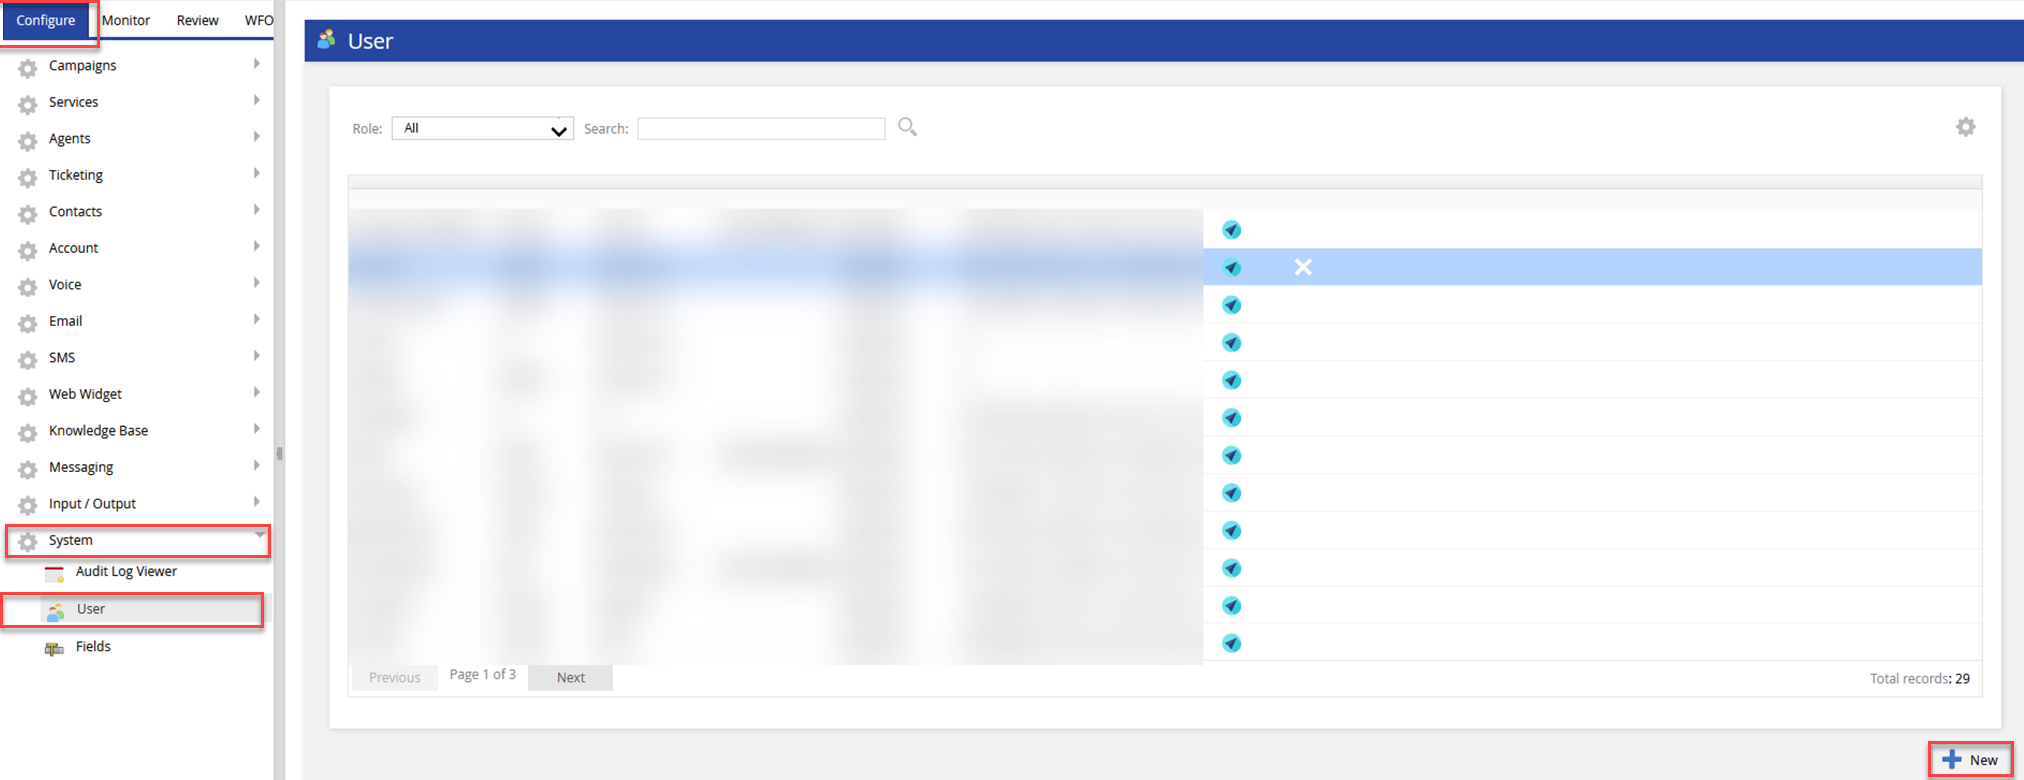
- Log in to the SmartReach Portal as a Sysadmin or Superuser.
- Go to Configure > System > User.
- In the User window, click the icon. The User pop-up window appears.
- In the Info tab, enter the user information in the following fields:
- User Name
- Role
- First Name
- Last Name
- Password
- Confirm Password
- Email Address
-
Mobile Number
Username and password are case-sensitive. If the password management functionality is enabled, the following restrictions also apply:- Passwords must contain a minimum of 8 characters and at least one digit.
- Passwords must not be the same as the last 4 passwords.
- Passwords must not exceed 40 characters.
- From the Role drop-down list, select an appropriate role for the user. For example, you can select Superuser or Manager.
Info
For more information about access permissions for each role type, see User Roles and Permissions.
- In the Optional Powers tab, enable the optional powers for users by selecting the required checkboxes:
For information about user roles, see User Roles and Permissions.
- In the Details tab, custom fields added for your users are displayed. You can update the values of the custom fields. You can create up to 20 custom fields from the Configure > System > Fields window.
- Click Save. The new user is added and the User editor window is displayed.
- Double-click the note icon to assign services to the new user. The Assign CallCenter/Service window is displayed.
- Select the services from the list and click Ok.
For more information about services, see Understanding Service Types.
The Audit History tab provides the logs that track changes made across LVP. Also, you can view the changes made to a user account on the Change History tab.
Demo
U17
Creating a User
To create a user:
- Log in to the LiveVox Portal (LVP) as a Sysadmin or Superuser.
- Go to Configure > System > User.
- In the User window, click the icon. The User pop-up window appears.
- In the Info tab, enter the user information in the following fields:
- User Name
- Role
- First Name
- Last Name
- Password
- Confirm Password
- Email Address
-
Mobile Number
Username and password are case-sensitive. If the password management functionality is enabled, the following restrictions also apply:- Passwords must contain a minimum of 8 characters and at least one digit.
- Passwords must not be the same as the last 4 passwords.
- Passwords must not exceed 40 characters.
- From the Role drop-down list, select an appropriate role for the user. For example, you can select Superuser or Manager.
Info
For more information about access permissions for each role type, see User Roles and Permissions.
- In the Optional Powers tab, enable the optional powers for users by selecting the required checkboxes:
Info
For information about user roles, see User Roles and Permissions.
- In the Details tab, custom fields added for your users are displayed. You can update the values of the custom fields. You can create up to 20 custom fields from the Configure > System > Fields window.
- Click Save. The new user is added and the User editor window is displayed.
- Double-click the note icon to assign services to the new user. The Assign CallCenter/Service window is displayed.
- Select the services from the list and click Ok.
For more information about services, see Understanding Service Types.
The Audit History tab provides the logs that track changes made across LVP. Also, you can view the changes made to a user account on the Change History tab.